How to complete Count Ymir's questline in Elden Ring Shadow of the Erdtree
To complete this sorcerer's sidequest, you'll need to follow his mysterious Ruins Maps.
Count Ymir is one of the NPCs and merchants you'll meet in Elden Ring's Shadow of the Erdtree DLC. His questline is closely tied to the Finger Ruins you'll find in the Shadow Realm, and he'll task you with tracking down all three of them as you journey through the expansion. Ymir's questline runs almost the entire length of Elden Ring's DLC, and is closely tied to Swordhand of Night Jolan's questline as well. Completing them both can reward you with one of the rarest new Spirit Ashes in the game, so it's well worth seeking out these strange ruins to see it through to its conclusion.
In this guide, we'll tell you everything you need to know about this sidequest, including a step-by-step walkthrough on how to complete Count Ymir's questline, and what you need to do at each Finger Ruins location.
On this page:
- First meeting - where to find Count Ymir
- Ruins Map (1st) location
- Second meeting
- Ruins Map (2nd) location
- Third meeting and Ruins Map (3rd) location
- Fourth and final encounter
First meeting - where to find Count Ymir
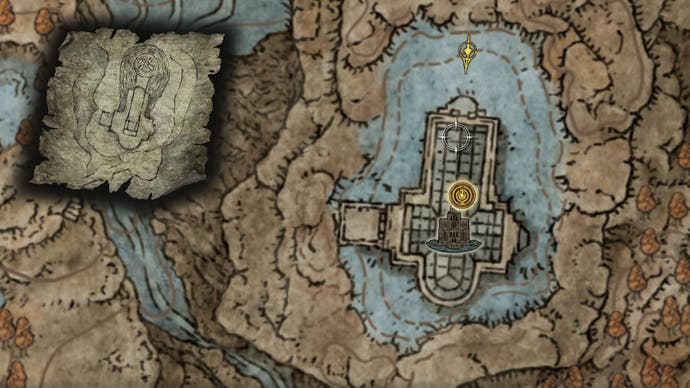
Count Ymir is located in the Cathedral of Manus Metyr in Scadu Altus. You'll need to follow the route to get to the east side of Shadow Keep in order to reach the cathedral, and you'll see his precise location on the map below:
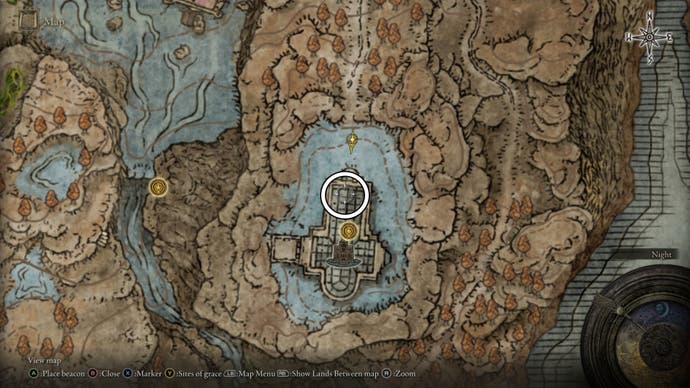
To get to Cathedral of Manus Metyr, you'll need to have reached Scadu Altus - either by defeating Rellana, Twin Moon Knight in Castle Ensis or by using the Sealed Spiritspring behind the Fort of Reprimand to skip Castle Ensis altogether.
Starting at the Site of Grace 'Moorth Ruins', head east under the large archway. Between the buildings to the north of the ruins, you'll find a hidden hole in the ground leading down to a ravine:
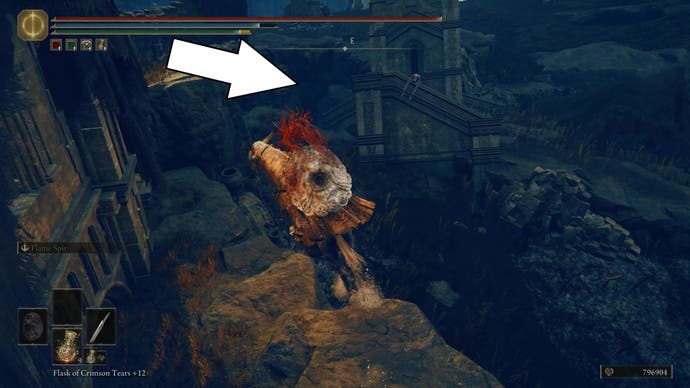
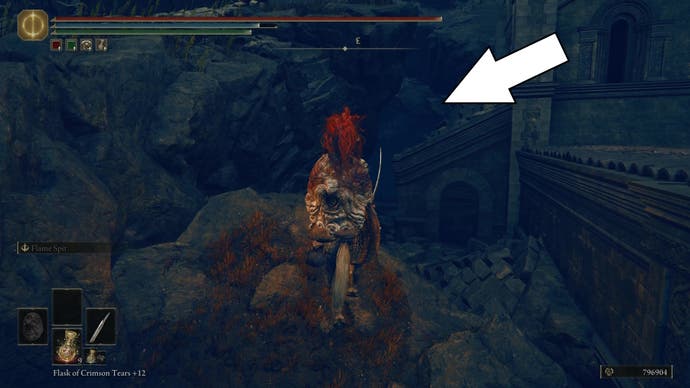
Follow the path downwards, using the available ledges to drop down the underground passage until you reach a ladder that takes you up into Bonny Village. You'll need to pass through this village to continue your journey to the cathedral, following the wooden bridges to the east.
After the Site of Grace 'Bridge Leading to the Village', head north through the woods with the wolves, and past the Furnace Golem on the other side of the rock tunnel. Continue north up the slope and you'll see the cathedral on the cliffside above you.
When you enter the cathedral and speak to Ymir, he'll rejoice at this chance meeting, giving you two items to celebrate: a Hole-Laden Necklace and a Ruins Map.

He'll say that the map he just gave you "charts the site of a hallowed ruin" and that it's said that "after sounding the hanging bell there... One's fate will be guided by the stars".
He asks you to go and sound this hanging bell at these ruins so that you, too, may know your fate. Ymir says he only wishes "to help those who fight for their purpose".
Before you leave, however, you can speak to Ymir again to either buy some of Shadow of the Erdtree's new Sorcery spells from him, or ask him about Glintstone Sorcery. Choose the latter and he'll tell you that he's a glintstone sorcerer who studies the stars and "examines the life therein". After his little history lesson, you can use him as a merchant to buy the following Sorcery spells:
- Glintstone Pebble: 1000 runes
- Great Glintstone Shard: 2000 runes
- Glintblade Phalanx: 2500 runes
- Carian Phalanx: 12,000 runes
- Carian Retaliation: 9000 runes
- Miriam's Vanishing: 10,000 runes
As you leave, he'll ask that you kindly "mind your feet" around the cathedral, as "you wouldn't want to hurt the little boy".
This "little boy" isn't immediately obvious, but if you leave the cathedral's western exit, you'll come to a small graveyard. There's a grave here you can interact with that states: "Yuri, beloved child. Taken before his time". Presumably, the "little boy" Ymir was referring to earlier.
Near this western exit, you'll also find Swordhand of Night Jolan, who's a devout follower of Ymir as well as his de facto bodyguard. You can speak to her here, then return to Ymir to ask him more about her.
Once you've done this, there's nothing more to do here. It's time to find the location of the first Ruins Map.
Ruins Map (1st) location
If you examine the Ruins Map in your inventory, you'll see that it matches the following area on your map:
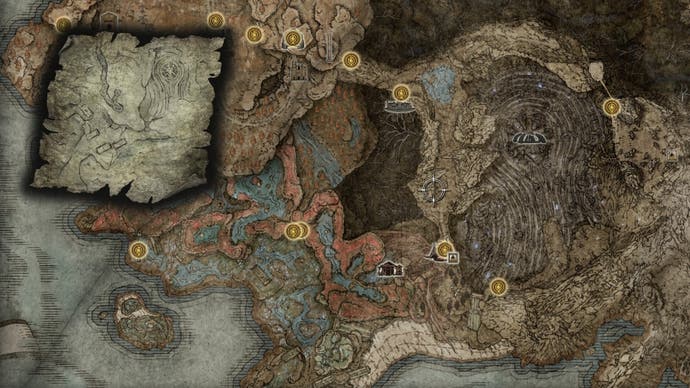
This location is called the Finger Ruins of Rhia, which is a sub-region of the Southern Shore, near Cerulean Coast.
You can follow our dedicated guides on how to get to Cerulean Coast and how to get to the Finger Ruins of Rhia for a more detailed walkthrough on how to access this location, but here's a summary of the route you'll need to take to find it:
- Fast travel to the Site of Grace 'Castle Front' in Gravesite Plain.
- Head south-east down the valley, past the Bloodfiends and Messmer soldiers fightingon your right.
- Follow the cliffs round to the left, and head left again before you get to the Miranda Flower in the poison bog.
- Continue down the path, through the cave guarded by a giant crab and second Miranda Flower until you get to the Site of Grace 'Ellac River Cave'.
- Use Torrent to jump down the stone ledges near the waterfall and river to the south, until you reach the Site of Grace 'Ellac River Downstream'.
- Ride past the Furance Golem and up the hill at the end of the river path to activate the Site of Grace 'Cerulean Coast'.
- Continue riding south, past the Ghostflame Dragon arena and Southern Shore map fragment stele, and up towards the Miquella's Cross location at the Site of Grace 'Cerulean Coast Cross'.
- Follow the cliff round to the north until you reach a large stone coffin jutting out of the landscape, and use the small passage on your right to drop down to the beach.
- Follow the beach all the way round to the east until you reach the end, then ascend up another stone coffin to the north.
- The Finger Ruins of Rhia is located at the top of this stone coffin slope, where you can activate the Site of Grace 'Finger Ruins of Rhia'.
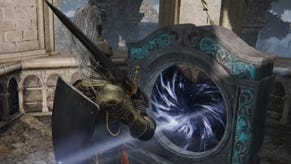
Once there, you'll need to head down to the north of the ruins and interact with the large hanging bell at the centre of it (which looks eerily reminiscent of the hole-laden necklace Ymir gave you back at the cathedral). Don't worry - you don't need to use the necklace (if you try to activate it from your inventory, you'll find it greyed out). All you need to do is walk up to the bell and interact with it.
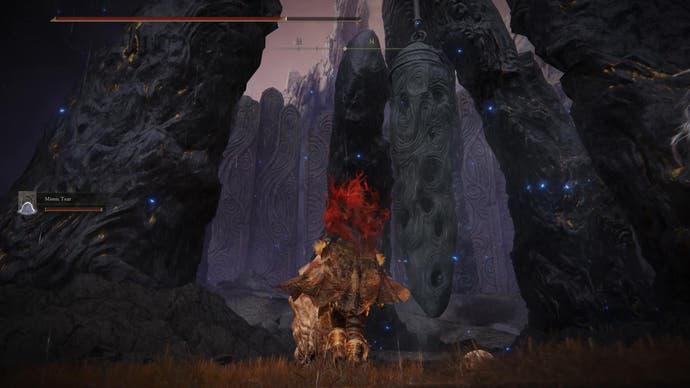
After sounding the bell, you'll be rewarded with the Crimson Seed Talisman +1, which 'greatly boosts HP restoration from your Flask of Crimson Tears'.
With the first ruins map completed, it's time to return to Ymir at the cathedral.
Second meeting
Fast travel back to the Cathedral of Manus Metyr and speak with Ymir. He'll have heard the bell and will congratulate you on your success. He'll also be holding and coddling one of those Fingercreeper enemies you'll have encountered in the Finger Ruins of Rhia, calling it Yuri and that "that tangled mess can't hurt you".
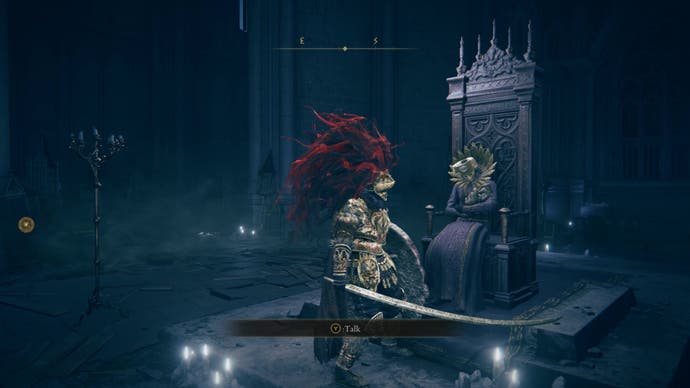
Put aside his unhinged ramblings, and Ymir will give you another Ruins Map to find, as well as the Beloved Stardust Talisman, which .
Speak to him again and you'll get the option to 'Ask about the nature of the world', at which point Ymir will reveal some additional lore about "the conceits - the hypocrisy - of the world built upon the Erdtree". He believes there is no hope of redemption for the souls of this world, and that each of them are "defective" - including Marika and "the fingers that guided her".
You can then 'Ask about Miquella', who Ymir believes saw the world for what it was, and that his bloodline was tainted with madness. After this, you can ask Ymir about the nature of the world again, and doing so will give a slightly different answer than the one before, revealing more about his obsession with mothers. After this, you can speak with Jolan again to further her questline. Then it's time to leave and find the second Ruins Map.
Note: Don't worry if you miss this step and end up finding the second Finger Ruins and sounding the bell there before returning to Ymir. The quest will proceed as normal, and you won't lose out on any dialogue options or rewards.
Ruins Map (2nd) location
The second Ruins Map depicts the Finger Ruins of Dheo, which is found to the far east of the Shadow Realm map in the Scaduview Hinterland:
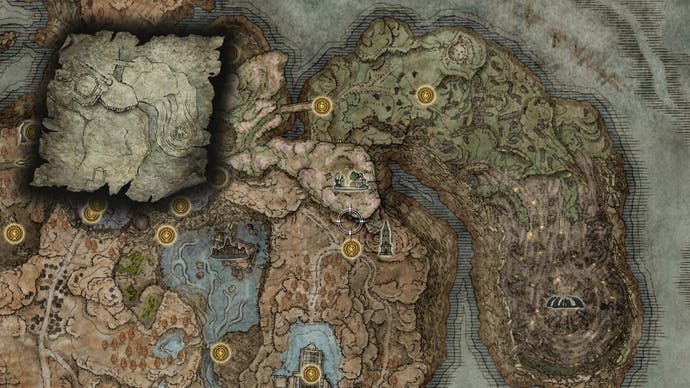
To access this location, you'll need to access the Shadow Keep's Back Gate, and be in possession of the O Mother gesture, which can be found to the north of Bonny Village.
We have dedicated guides on how to get to the Shadow Keep's Back Gate, as well as how to get to the Finger Ruins of Dheo and where to find the O Mother gesture, but here's a summary of the steps you need to take to get there:
- Fast travel to the Site of Grace 'Storehouse, Back Section', which you'll reach by entering the Shadow Keep from the east via its Church District (very near the Cathedral of Manus Metyr).
- Climb the nearby stairs that takes you to the upper levels of the Shadow Keep, and go up one more floor when you reach the top.
- On this upper floor, go through the hole in the wall to the right of one of the large bookshelves to reach a staircase leading up to the Site of Grace 'Storehouse Loft'.
- Use the lift to reach the upper rafters of the Storehouse, and follow the beams round to the other side of the tower, taking care not to fall off to your doom.
- Once you're on the other side of the Storehouse Loft, go outside and use the two lifts to take you right back down to the bottom of the Shadow Keep.
- Activate the Site of Grace 'Shadow Keep, Back Gate' and enter the room on your left (go outside and you'll enter a boss fight with Commander Gaius, which isn't necessary as part of this questline).
- Perform the O Mother gesture in front of the statue, and go through the newly-revealed passageway behind the statue.
- Activate the Site of Grace 'Hinterland', and either battle or ride past the two Tree Sentinel bosses further along the cliff path.
- Go over the bridge and activate the Site of Grace 'Hinterland Bridge' and follow the peninsula round to the south.
- The Finger Ruins of Dheo are located at the very southern tip of the peninsula.
Once again, you'll need to travel to the centre of the ruins and sound the hanging bell there. On doing so, you'll be rewarded with the Cerulean Seed Talisman +1, which 'greatly boosts FP restoration from your Flask of Cerulean Tears'.
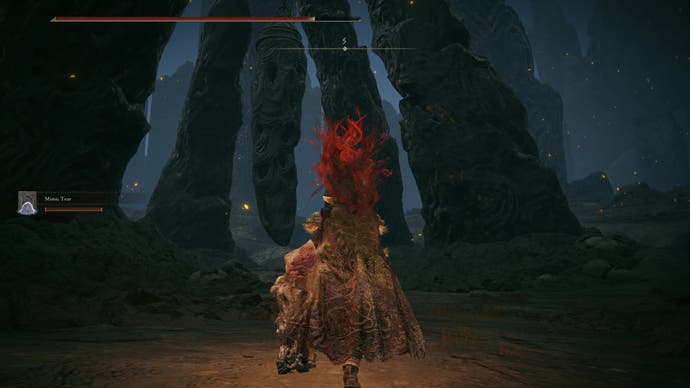
Now it's time to return to Ymir again to begin the final stage of his questline.
Third meeting and Ruins Map (3rd) location
Fast travel to the Cathedral of Manus Metyr and Ymir will once again be overjoyed at hearing the sound of the second bell. Now, he'll present you with his parting gift: a third Ruins Map, which looks suspiciously like the cathedral itself.
Ymir also has three new Sorcery spells for sale now, including:
- Glintstone Nail: 12,000 runes
- Glintstone Nails: 12,000 runes
- Fleeting Microcosm: 20,000 runes
Once you're ready to proceed, rest at the Site of Grace and pass time. Upon your return, you'll find Ymir will have vacated his throne. Interact with it, and it will reveal a hidden ladder down beneath the cathedral.
The third Ruins Map location, it turns out, was under the cathedral the entire time, and it's called the Finger Ruins of Miyr. However, before you can get to its hanging bell, you'll be invaded by an NPC called Swordhand of Night Anna.
Defeat Swordhand of Night Anna
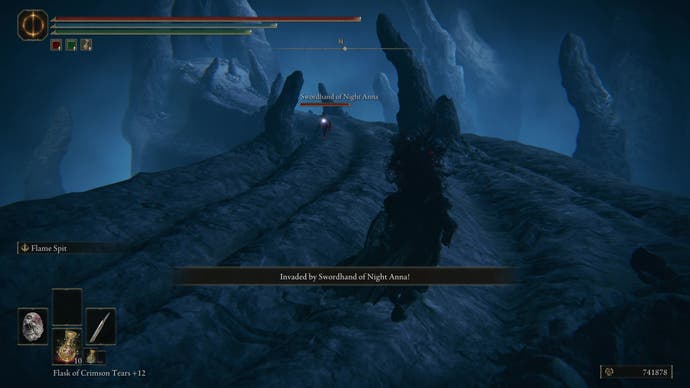
Anna isn't a particularly difficult adversary. Her claw armament can inflict bleed damage, but blocking her swipes and jump attacks doesn't take up to much of your stamina, and she's quite easy to parry and break her defences.
Once she's been defeated, return to Jolan and tell her you were attacked. Then go back down the ladder and sound the hanging bell at the end of the Miyr ruins.
Be warned: sounding the hanging bell will immediately transport you to the boss arena of Metyr, Mother of Fingers, who is one of the DLC's ten Remembrance bosses, so make sure you're prepared for a fight.
Defeat Metyr, Mother of Fingers
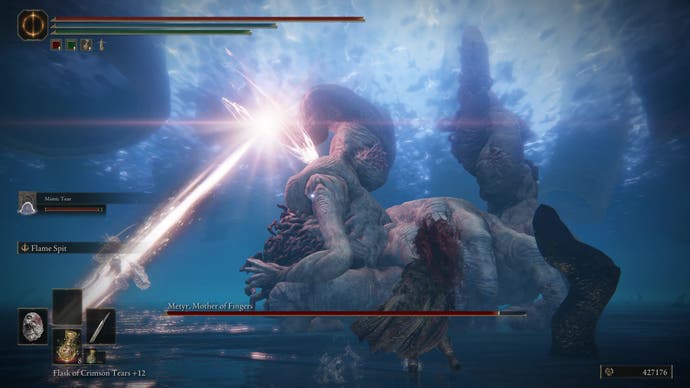
Thankfully, Metyr is one of the easier Remembrance bosses in Elden Ring's DLC, but she's still a tough opponent nonetheless. Summon your favourite Spirit Ash to help provide a distraction while you get up close and personal attacking Metyr from the side.
Metyr has a powerful head slam attack, and can fire beams of light from her face in front of her. She can swipe from side to side with her large hands, and will occasionally rise up slowly before slamming her entire body to the ground for an area of effect attack. Most of these are quite easy to avoid - either by dodging or by having your Spirit Ash take the brunt of her attacks. You can also block a lot of damage with a good shield, as it doesn't take up too much stamina to defend.
As her health gets lower, Metyr can unleash a large light attack that can take quite a chunk off your health bar if you get caught in it. It's best to run away from this one, though be careful: after this attack, she'll have activated her own Fleeting Microcosm spell between her rear tails, which can inflict gravity damage on you. Hopefully, though, you'll already be in the final stretch of this fight once this happens, and between you and your Spirit Ash, you should be able to make short work of her before this happens.
On defeat, you'll be rewarded with 420,000 runes and the Remembrance of the Mother of Fingers. Activate the Site of Grace 'Finger Birthing Grounds' and fast travel back to the cathedral.
Fourth and final encounter
Alas, the boss gauntlet isn't over yet. Once you're back at the cathedral, you'll find it completely empty. Interact with Ymir's throne again and you'll immediately be invaded by Swordhand of Night Jolan, who accuses you of wounding Ymir "most irreparably" by defeating Metyr, who now wants you dead. Charming.
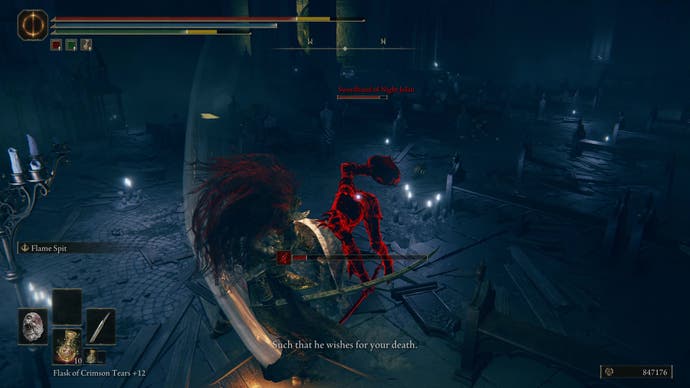
You'll need to defeat her in combat before you can proceed, but like her sister Anna, she's not too difficult to take down. Her sword can also inflict bleed damage, and blocking attacks take up more stamina, but she's just as easily parried to open up an opportunity for getting lots of attacks in.
On defeat, she'll cry out: "Oh, my dear star... A fine mother... you will be..." and you'll immediately hear Ymir reply: "My shining star. Grant me a mother's strength" in the darkness.
Defeat Count Ymir, Mother of Fingers
Yep, it's time to fight Ymir as well, so make sure you heal up in this moment of downtime before Ymir materialises next to his throne.
Ymir is also reasonably easy to defeat compared to other Shadow of the Erdtree bosses, though none of them outdo him when it comes to his creepy finger coat, which is now squirming with monstrous finger creatures. Oh joy.
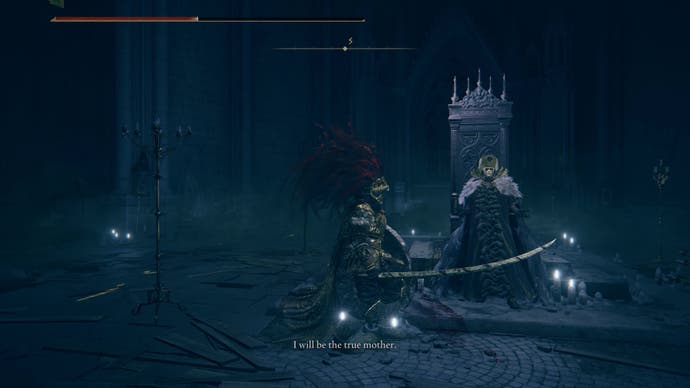
Unlike Jolan, the newly-styled Count Ymir, Mother of Fingers has his own full boss-style health bar to contend with. As a glintstone sorcerer, all of his attacks are magic-based, but you can use the pillars of the cathedral (and his throne) to hide from a lot of these attacks before rushing in to deal damage.
His defences are quite weak, so he shouldn't be too difficult to take down. Just watch out for his large finger shield grabs, as this spell can rise up from the ground beneath you, dealing damage to you while protecting Ymir. Still, it's easily avoided if you keep your distance, which isn't difficult when he's constantly teleporting around the arena.
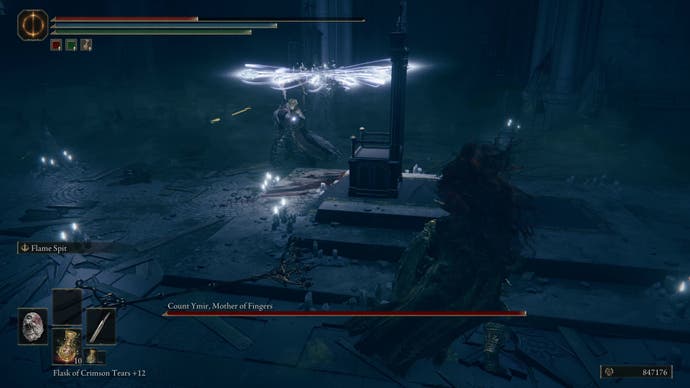
On defeat, you'll be rewarded with the following items:
- Ymir's Bell Bearing
- Maternal Staff
- High Priest Hat
- High Priest Robe
- High Priest Gloves
- High Priest Undergarments
There's one more reward you can get for completing Ymir's questline, however, so rest at the Site of Grace and pass time. Then, return to the graveyard by the cathedral's west exit, and you'll find the Sorcery spell Cherishing Fingers by Yuri's grave.
This brings Count Ymir's questline to a close - though there's still more to do with Swordhand of Night Jolan, so make sure you return to speak with her before you depart - especially if you're after the rare Jolan and Anna Spirit Ash.
Need more help? Improve your stats by finding all of Shadow of the Erdtree's Scadutree Fragment locations and Revered Spirit Ash locations. Alternatively, see which Erdtree bosses you've still got left to beat, and track down some great new early weapons to help you on your adventure.


